Los Angeles · Orange · Ventura · Santa Barbara & Surrounding Counties
Wall Insulation
Works Summer AND Winter!
The why, where, and when to address walls
Why – Most homes built before 1972 do not have insulation in the walls, and many homeowners aren’t even aware that their walls are empty. During the winter, insulated walls help retain heat, preventing warmth from escaping—while in the summer, they help keep cool air inside. Proper wall insulation keeps heating and cooling costs from going through the roof all year long! Once insulated, walls will no longer feel ice-cold or hot to the touch, and the risk of condensation and mold drops significantly. In addition to improving comfort, wall insulation can also greatly reduce noise both from outside the home and between rooms – Which can foster an exceptional sense of tranquility between shared walls and in noisy neighborhoods. *See page on soundproofing for more info.
We always suggest that homeowners looking to insulate walls first check their attic to make sure it’s adequately insulated. Because 70% of heat gain and loss occurs through the attic, it is by far the most important area of your home to address. Quite frequently, people assure us they have a full 12-inches of material in their attic, but when we arrive at the job, we discover that they have just 2-3-inches. We mention this because although wall insulation will help, if the attic is not thoroughly insulated, you won’t notice nearly as significant an improvement. A well insulated attic is critical.
After the attic is properly addressed – It’s crucial to note that no matter how thin the existing insulation there’s one missing, we cannot inject more insulation into a wall that already has some existing insulation in it. Even if your existing insulation is light & fluffy, we cannot inject more. See our page on ‘How to Check for Existing Insulation.‘
Where – When it comes to selecting which walls to prioritize insulating, we recommend the South & West facing walls, often referred to as the “hot walls.” These walls get the most sunlight baking directly on them throughout the day, causing the walls to become hot and radiate heat into the home even well after sundown. Once insulated, this can be dramatically reduced.
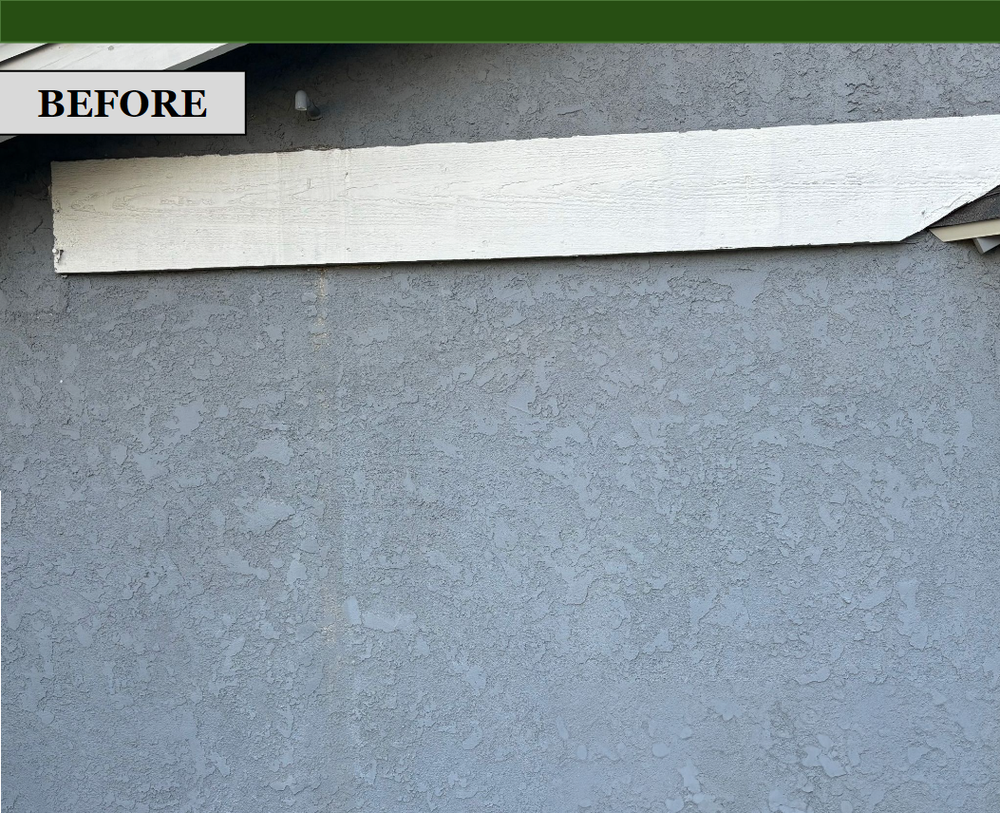
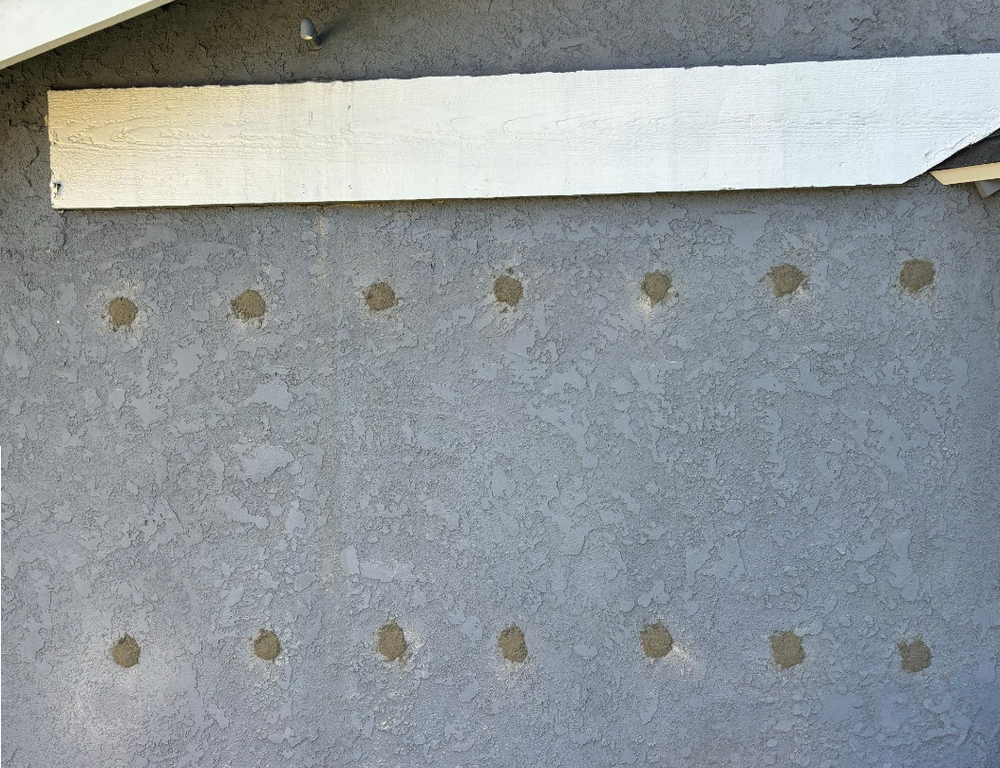
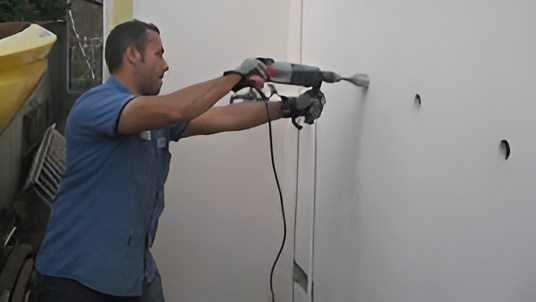
When – The best possible time to insulate walls is ideally when the home is about to be re-painted, re-stuccoed, or texture-coated. This is because wall insulation cannot be injected through the attic area nor from underneath the home, so our crew will have to drill several holes on the face of the wall, from either the exterior or interior, to inject the insulation into.
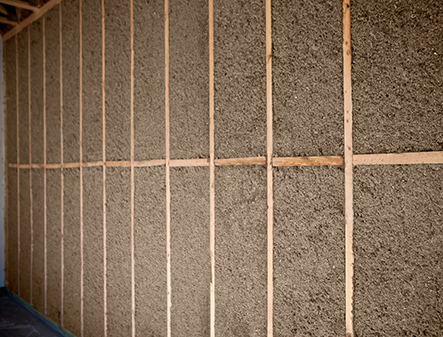
*If you had X-ray vision to see through the wall, this is how the material would
look. This photo is purely illustrative of what’s behind the wall. We only
insulate walls covered by drywall, not open framing!
Wall Insulation Process:
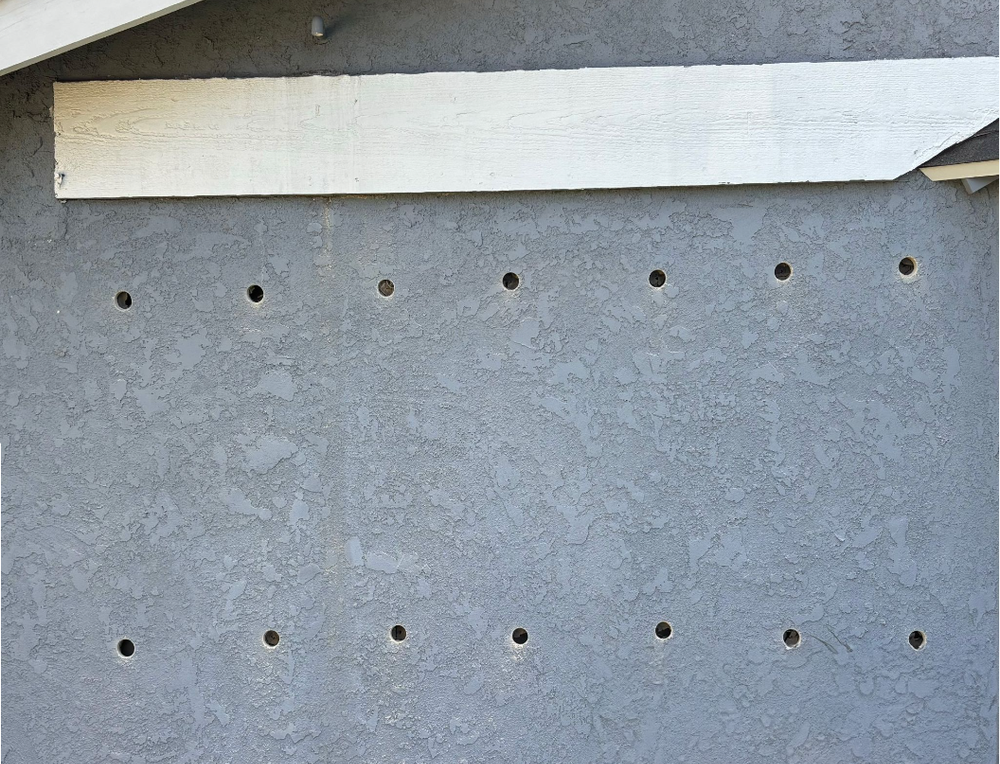
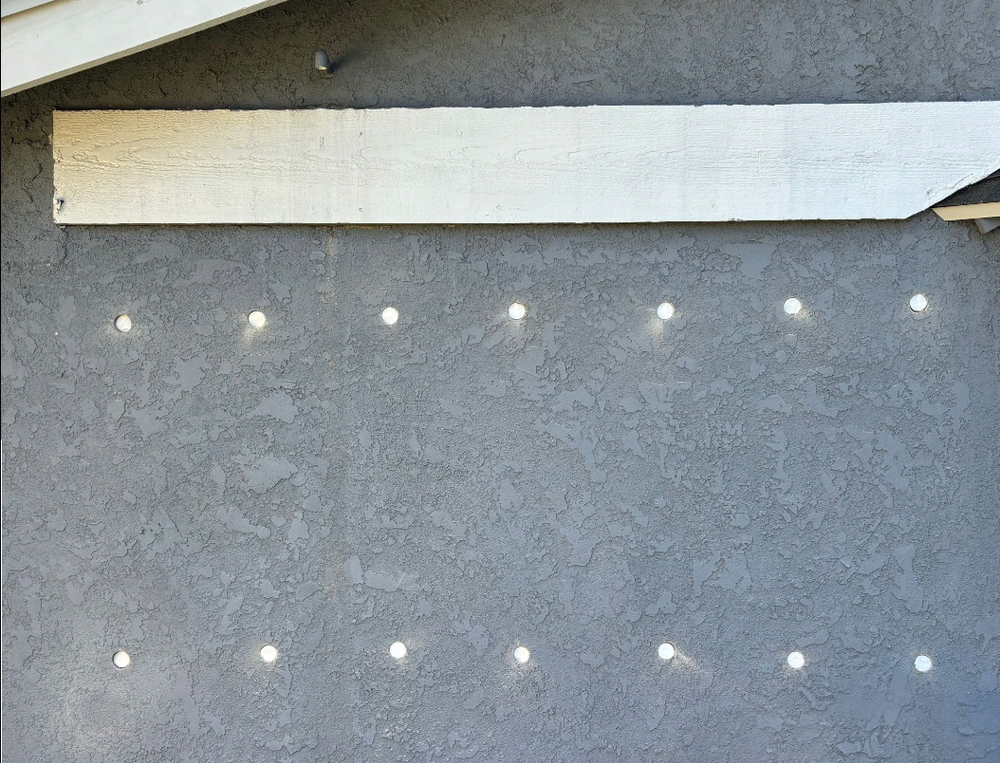
The wall insulation process involves drilling 2′′ holes in each bay, above and below the fire-block. This generally means one hole about 3-feet up the wall and another hole about 6-feet up the wall. These sets of holes are made every 16′′ across the wall to access each bay. The walls are then injected with blown-in insulation until full. Then, the holes are plugged with a Styrofoam cut out and stucco patching is applied. Each patch is floated to match a standard rough stucco texture. See our step-by-step visual guide below!
Options for Drilling Location
We can drill from either the interior (inside of home) or exterior (outside of home) at the same cost, depending on your preference. When working from the interior, it is best when the home is vacant, being remodeled, or prepared for exposure to dust. Because wall insulation can be a bit dusty and require prep work (moving everything 3 feet away from the wall), most of our work is done from the exterior.
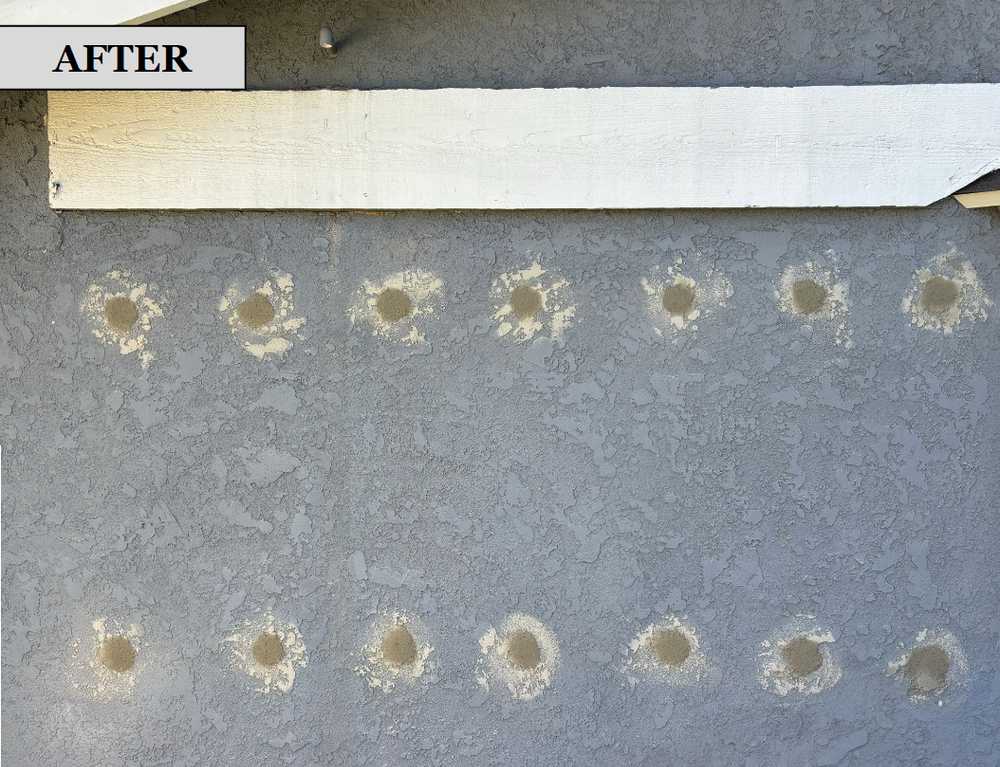
Stucco Patching Process
We provide an exterior stucco patch as part of our process (some companies do not). The texture we can best match is a standard rough finish, typical of most homes. Textures such as a raised Spanish-lace, texture coating, or skip-trowel are not finishes we can match with great accuracy. In those instances, we refer specific contractors who can best finish the job. Our patch typically dries in a day and can be primed & painted soon after. Some homeowners repaint the entire home, others simply color-match the existing paint and paint each patch.
Interior patching, on the other hand, involves using a spackle or joint compound. The patching generally looks great when applied, but will tend to shrink and crack as it dries over a 24-hour period. We only provide the first application of patching material, a second coat of additional patching (not provided by us) will be required. The final steps of patching involve some sanding, which can also be notably dusty.
Drilling for One-Story vs. Two-Story Homes
We can insulate the walls of a one-story home from either the interior or exterior, but when it comes to two-story homes, we generally need to drill the second-story walls from the interior. The process of drilling holes into stucco involves the use of a large and power drill which is rather impractical to work with from atop a conventional ladder to reach the second story. Because of this, we will ask to drill the second-story from the interior. Sometimes we can work on balconies, roofs, or patio covers. We deal with each situation on an individual basis.
2 inch holes are drilled bay by bay - every 16 inches apart at the 3 foot and 6 foot height interval.
Material is injected through the holes.
Foam plug is installed.
Stucco patch is floated. If doing interior walls, second coat of stucco patch is applied by homeowner or contracted painter.
Patch is smoothed to match stucco texture
Stucco is now ready for primer and paint by homeowner or contracted painter.
Not All Wall Insulation Processes Are the Same!
Long ago, when retro-fit wall insulation was new, all the companies bought in. Every now and then they’d be insulating the wall when suddenly… “crack!” They’d discover the wall had bulged, cracked, or nearly exploded off the framing! The problem? Set the machine’s pressure too high, you’d crack, pop or damage walls. Set the pressure too low, your hoses would plug and the wall wouldn’t fill well.
Over time, several companies had either thrown in the towel or found what they thought was a happy compromise in air pressure to insulate with low chances of damage. Except, in later years, homeowners would remodel and open-up their walls to discover what they thought was settled insulation. It wasn’t settled; it was never thoroughly filled to begin with!
Today, only a small handful of companies still do retro-fit wall insulation. If you call around, you’ll find a lot of offices referring us for wall insulation because we innovated a method of insulating walls without fear of damage, and our process actually gets about 35-40% more material into the wall. And let me tell you, 35-40% nearly doubles the effectiveness and especially makes a difference for soundproofing!
I hate to divulge our secret, but we’d rather you understand the process then just take our word for it. Rather than taking our chances on one pressurized setting that’s too high and risky, or too low and underperforming; our truck-mounted machine has a back-pressure bypass relief system that senses the pressure in the wall and safely regulates it such that we won’t bulge, damage, or explode the wall – Starting-off high and dwindling down to lower degrees to finish the wall injection nice and safe. As we perfected this process, we noticed each job was using 35-40% more material. Where was this material going? Into the wall. We’re able to inject more material into walls which other companies considered “done.”
In addition to our fantastic machines, we drill 2-inch holes while others are still drilling 1-1/2-inch holes. The larger hole means a more expensive drill-bit and certainly more time drilling and patching, but it’s a big part of why we can get 35-40% more material into a wall. And we’re very proud of our innovation!
What About Areas That Can't Be Insulated?
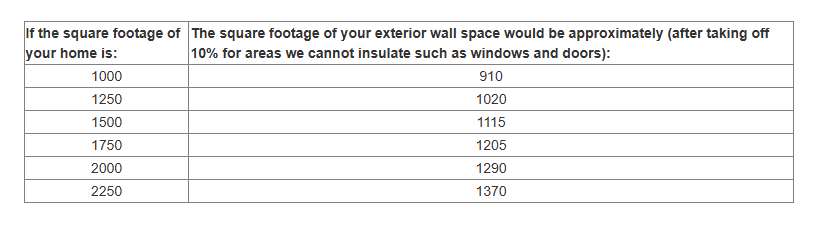
Wall insulation is something we charge for based on a price per square foot. We deduct for windows, doors, fireplaces, and other areas that cannot be done. Keeping it simple, we only charge for the areas we’re insulating. We drill, fill, plug, and patch the holes. Some people just insulate particular walls – perhaps the south and west “hot” walls of the house, while most people insulate the entire exterior perimeter of their home.
The Common Wall
The common wall is the wall between your garage and your home. Sometimes, in older homes, this wall is open-framing and cannot be insulated using our injection process. But most of the time, the common wall has drywall, plaster, or some material on it. Most homeowners will insulate this wall. It helps contain heat within the home during the winter and also serves to block the heat that develops in the garage from entering the home in the summer. Arguably, the common wall may not make as much a difference as the other exterior walls in your home. Additionally, sometimes there is cabinetry or other obstructions in the way. Each homeowner just has to decide for themselves if they want this section of wall done or not.
Estimating the Square Footage for Exterior Wall Insulation